Getting Started with Matrox Design Assistant
Overview
This application note provides information on how to install, configure, and use Teledyne FLIR USB3 Vision and GigE Vision machine vision cameras with Matrox Design Assistant software.
Note: for Bumblebee X stereo cameras, see Getting Started with Bumblebee X in Matrox Design Assistant.
Preparing for Use
Before you use your camera, we recommend that you are aware of the following resources available from your product's webpage:
- Getting Started Manual for the camera—provides information on installing components and software needed to run the camera.
- Technical Reference for the camera—provides information on the camera’s specifications, features, and operations, as well as imaging and acquisition controls.
- Firmware updates—ensure you are using the most up-to-date firmware for the camera to take advantage of improvements and fixes.
 |
To set up your camera to work under Matrox Imaging Library, follow the instructions in Getting Started with Matrox Imaging Library. |
Installation and Configuration
Matrox Design Assistant 4.0 supports USB3 Vision and GigE Vision cameras.
Step 1--Install Design Assistant
Download Design Assistant from the Matrox website and follow the installation instructions. During the installation process, select USB3 Vision and GigE Vision support.
Note: USB3 Vision cameras also require the installation of Matrox SP1.
Step 2--Connect the Camera to the PC
Connect the camera to the PC. For information, see the camera’s Getting Started Manual.
Step 3--Start Design Assistant
To start Design Assistant:
- Launch Matrox Imaging Library Control Center.
Start Menu → All Programs → Matrox Imaging Library → Matrox Imaging Control Center. - Under Design Assistant 4.0, click Matrox Design Assistant.
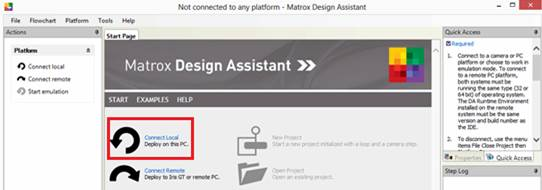
- Click Connect Local.
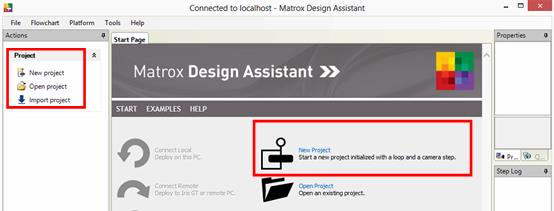
- Open a project.
- To open an existing project, on the Start Page, click the Open Project icon.
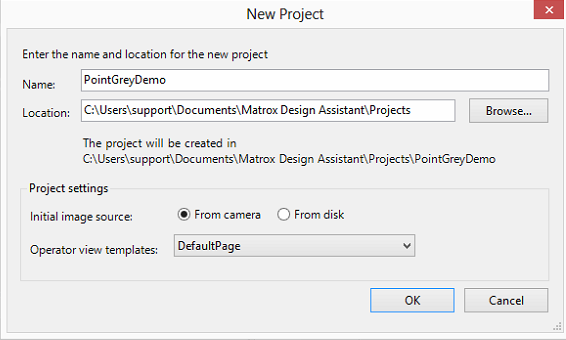
OR - To start a new project, click New Project, enter the name and click OK.
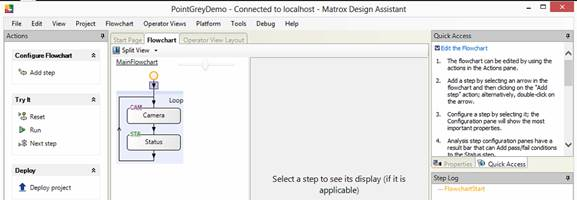
Design Assistant configures the system and allocates a camera.
Step 4--Configure Initial Camera Settings (Optional)
To configure camera settings:
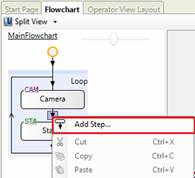
- Right-click on the down arrow on the Flowchart and select Add Step.
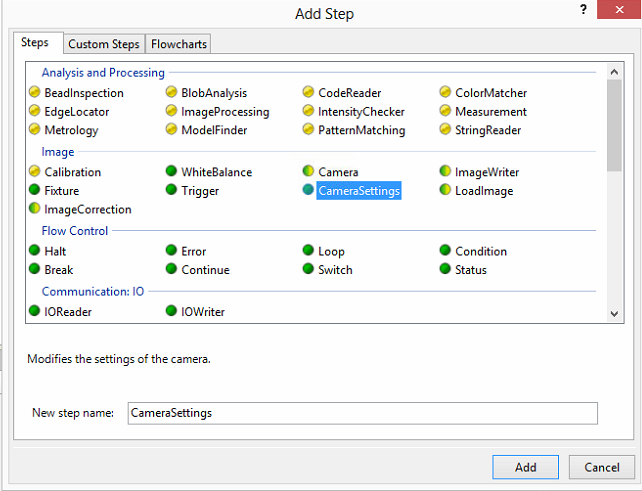
- Select CameraSettings and click Add.
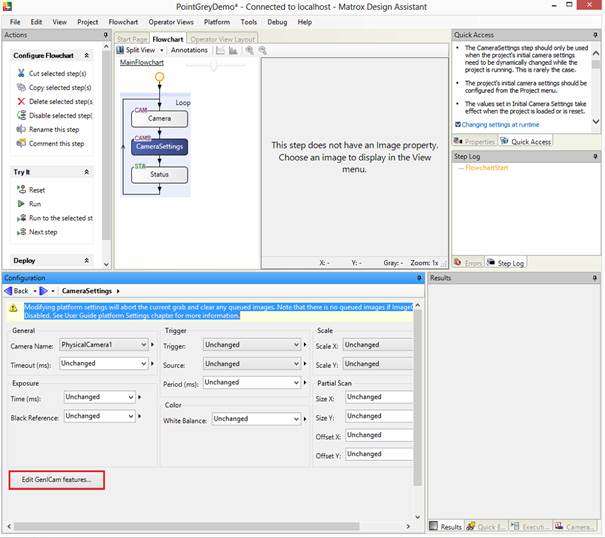
- Select CameraSettings in the Flowchart and click Edit GenICam features to change camera settings.
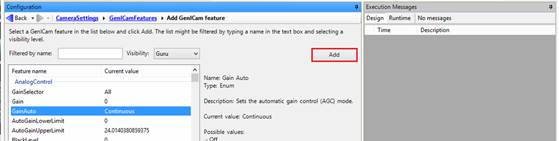
- Click Add.

- Select the camera attribute, change the value, and click Add.
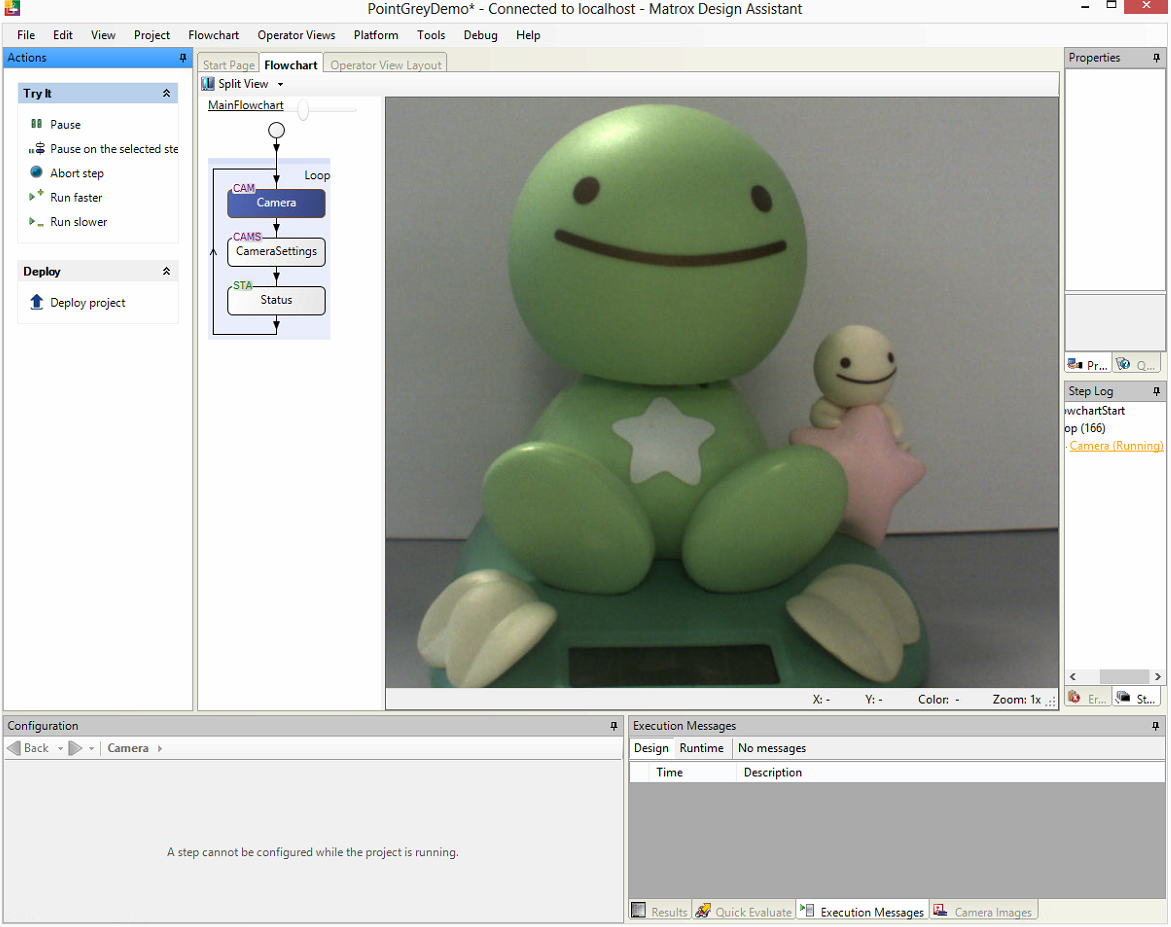
Step 5--Start Acquisition
To start acquisition, in the Action pane, click Run or press F5.
Troubleshooting Tips
How Do I Correct a Camera Allocation Error?
If your camera has an allocation error, you may need to set the Initial Platform Settings to the correct system.
To adjust your settings:
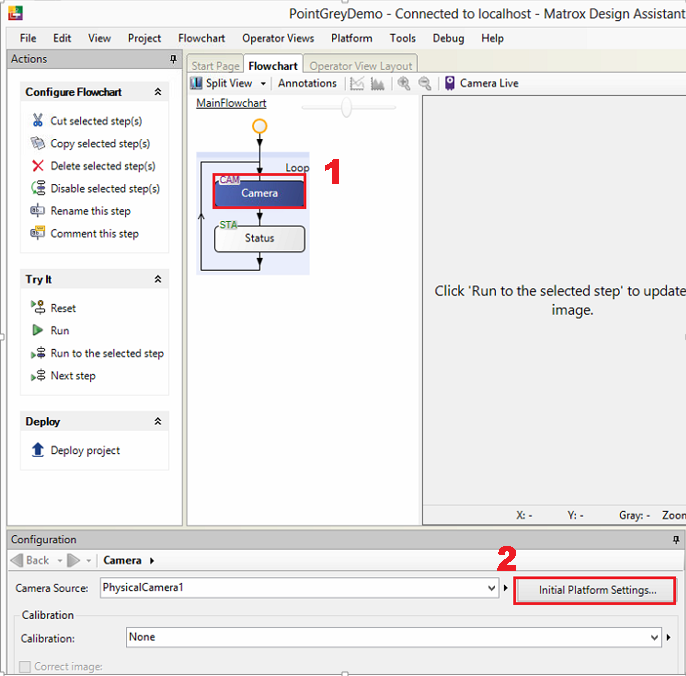
- In the Flowchart window, select Camera.
- Click Initial Platform Settings and browse to System1 tab.
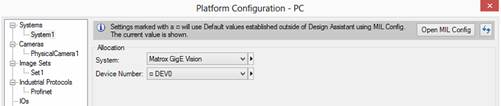
- Set your system to the appropriate camera:
- To stream a GigE Vision camera, set your system to GigE Vision.
- To stream a USB3 Vision camera, set your system to USB3 Vision.
The following additional suggestions may help you troubleshoot issues with your camera.
- Update the driver to the latest version.
- Update the firmware to the latest version.
- Update the software to the latest version.
- Perform a soft reboot and if still necessary a hard reboot of the PC.
- Disable then enable the driver.
- Power cycle the camera. The following additional suggestions may help you troubleshoot issues with your camera.
- Power the camera through GPIO, if wiring harness is available.
- Use a separate host controller instead of an integrated one, if available.
- Ensure the card is powered via the 4-pin hard drive connector, if applicable.
- Use a different cable or host controller or PC.